Two-Factor Authentication on Your Home Server
It always felt a little weird to have various apps running on my home server and have them be open to the internet. Even though most of them provide authentication options, they are quite lacking in functionality. There’s also the problem of having different credentials for each app/service. Password managers don’t really help, as I run all my services on the same domain (each served in a different subfolder). So I often found myself not remembering a username/password, searching the specific app documentation on password recovery, nuking the users database and recreating the admin user.
To serve all of my web services/apps, I use the linuxserver/letsencrypt (recently rebranded as linuxserver/swag) Docker container. It requires the minimum amount of manual intervention, it’s easily configurable and provides tons of preconfigured reverse proxy configurations for popular applications (seriously).
With the container, you get granular control over authentication for each application. Up until recently, only BasicAuth and LDAP were supported. However, a while ago, 2FA support was also added through Authelia. Authelia is an open-source authentication and authorization server that provides two-factor authentication and SSO capabilities via a web portal. It works along reverse proxies like Traefik, HAProxy and nginx (which we use), and supports multiple second factor authentication types:
- hardware-based (like Yubikey)
- Time-based One-Time password (like Google or LastPass authenticator)
- mobile push notifications (through Duo)
I chose to go with push notifications, as typing one-time passwords again and again is annoying, and I don’t have a Yubikey.
Getting a Duo account
Duo is a multi-factor authentication provider. The company was bought by Cisco in 2018, and by browsing their website you can easily tell that corporate took over some time ago. However, we like them because they provide a free tier of their service (which is hard to see from the homepage, but it’s there).
By using the free tier we get push notifications support for up to 10 users (which should be 9 users more than we need), so this is a great service for personal use-cases like securing your home server.
There’s a Free Trial button on the homepage which looks kinda like we’re about to commit to something big, but it’s the only way to register.

Click this very inconspicuous button to register, free of charge!
After completing this part, we’re treated to the admin page where we can proceed to do our thing. At the top of the page Duo informs us that we’re on a free trial, but we don’t really care about those fancy premium features, as what we’re gonna be using is also available in the free tier.
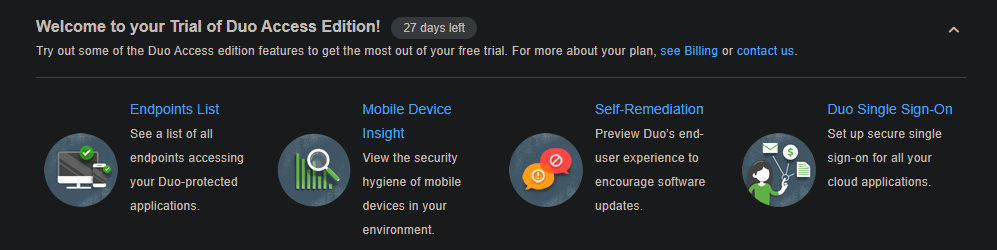
These we can safely ignore
Protecting an application with Duo
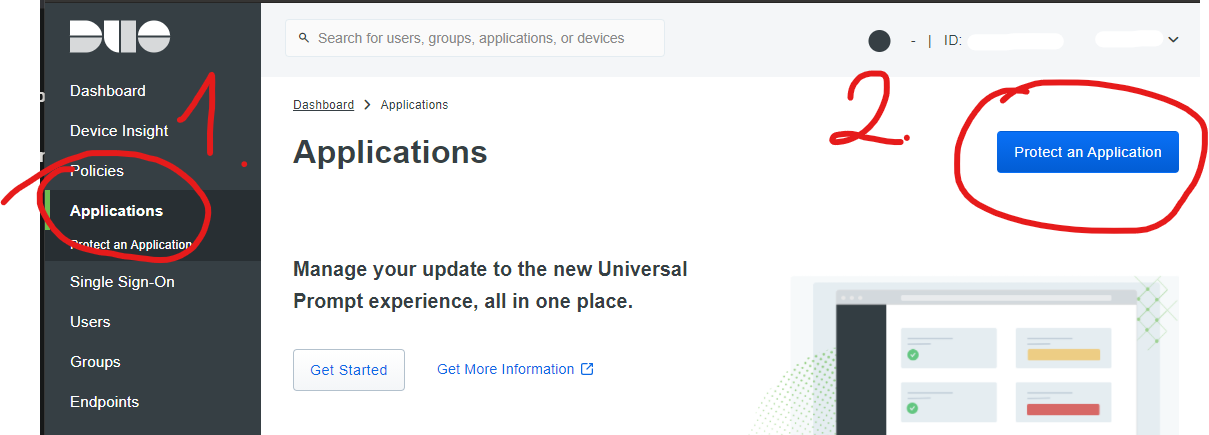
To set up authentication for our server, we click the Applications button on the sidebar, then Protect an Application.
Writing this post also gives me the chance to check out the new Windows Snip & Sketch. Cool!
Search for Partner Auth API, click Protect, and make note of the three pieces of super-secret information (actually only one of them is super-secret, but I’m not gonna show off any of them):
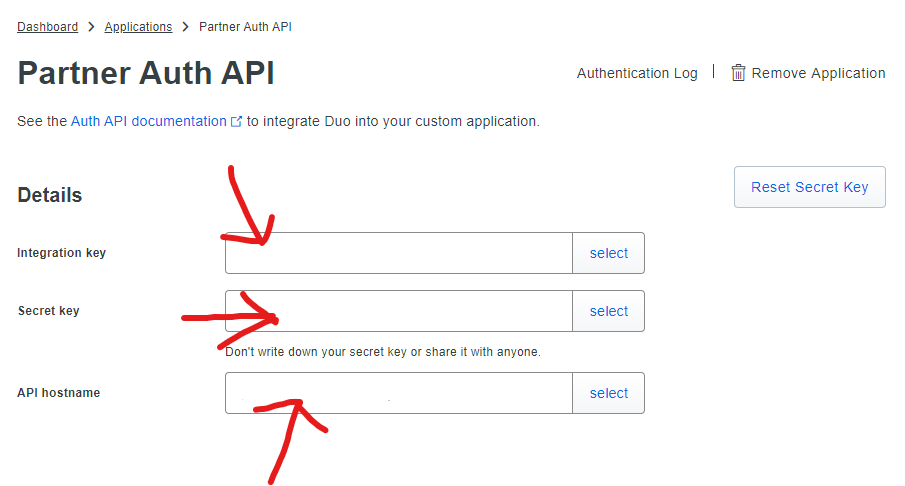
Rate my arrows
Further down on the configuration page, where the Settings section begins, you can also set a custom name for the application so it says something different than Partner Auth API when you get your push notifications. After you’re done with all the hijinks, hit Save at the bottom of the page.
Creating a Duo user
Thought we’re done with this? Ha… we’re not. Next we’re going to add the user which we’ll link to the Duo mobile app, and which we’ll use to authenticate on our server.
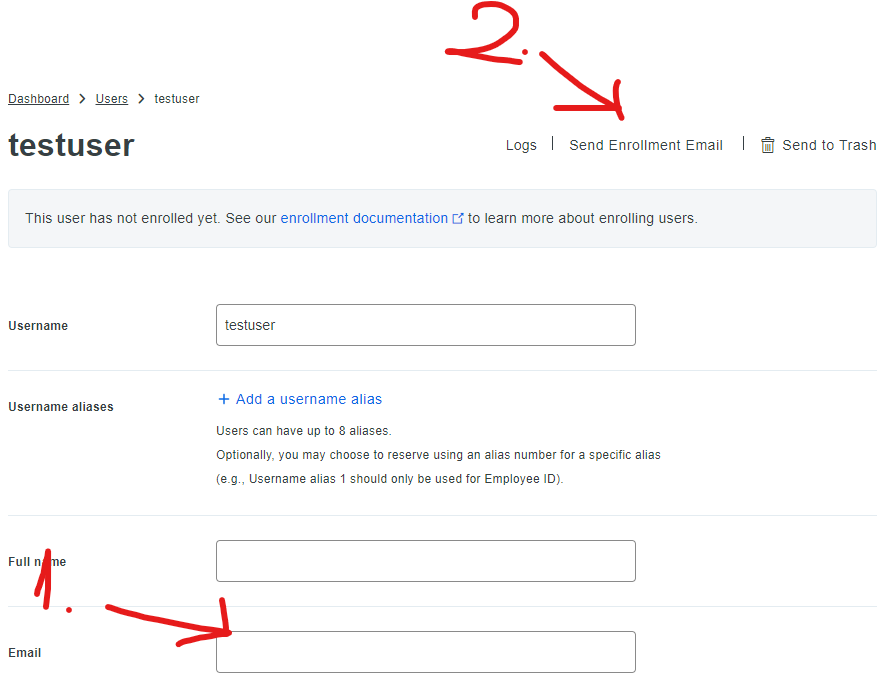
This is done on the Users tab, hit Add User on the top right and enter your desired username.
Note
Somewhat important: this username will have to match the one we’re going to later configure in Authelia, and we’ll use this username to log in on the portal. So make sure you choose something memorable as you’ll be typing it frequently.
Fill in your email (you will be getting a link to enroll there), and click Send Enrollment Email.
Enroll the new user
On your mobile device, open the link from the enrollment mail and follow the steps to finish setting up your user. We’re done with the Duo part!
Setting up the Authelia container
For the remaining part of the guide I’ll work under the assumption that we’re using the linuxserver/swag container as our reverse proxy solution (attention to container naming is important).
We’ll be using the container provided by the Authelia team: authelia/authelia
However you like to set up your Docker containers, the most important things for this one are:
- name:
- this has to be
autheliaif you’re using linuxserver/swag
- this has to be
- environment:
TZ: your local timezonePUIDandPGID: usually 1000 (see this for a detailed explanation)
- network:
- the container has to run under the same network as the reverse proxy
- volumes:
- it’s a good practice to have the configuration persistent by mounting a
directory on your filesystem: the container config path is
/config
- it’s a good practice to have the configuration persistent by mounting a
directory on your filesystem: the container config path is
- restart policy:
- this should be kept in tune with the reverse proxy container, as one won’t work without the other once set up
Fire up the container once to have it generate some configuration defaults, then stop it so we can manually edit things.
We’ll begin with the main configuration file which lives at
/config/configuration.yml. For our use case we’ll use the simplest combination
of options, with a local sqlite database, without redis. We’re not going to
touch on access control or other features.
host: 0.0.0.0
port: 9091
server:
  read_buffer_size: 4096
  write_buffer_size: 4096
  path: "authelia"

log_level: debug

# the URL to redirect someone to if they accessed the authentication
# portal directly
default_redirection_url: https://google.com/

duo_api:
  hostname: <API hostname from Duo>
  integration_key: <Integration key from Duo>
  secret_key: <Secret key from Duo>

authentication_backend:
  # we're not setting up email notifications so this is useless
  disable_reset_password: true
  refresh_interval: 5m

  # a local database to store our users in
  file:
    path: /config/users_database.yml
    password:
      algorithm: argon2id
      iterations: 1
      key_length: 32
      salt_length: 16
      memory: 1024
      parallelism: 8

access_control:
  default_policy: two_factor

session:
  name: authelia_session
  expiration: 1h
  inactivity: 5m
  remember_me_duration: 1M
  domain: <your domain>

regulation:
  max_retries: 5
  find_time: 2m
  ban_time: 5m

storage:
  local:
    path: /config/db.sqlite3

notifier:
  disable_startup_check: false
  filesystem:
    filename: /config/notification.txt
This is probably the most barebones you can go configuring Authelia. After this,
we’ll create our user in /config/users_database.yml:
users:
  # has to be the same as the Duo username
  testuser:
    displayname: "testuser"
    password: "$argon2id$v=19$m=1048576,t=1,p=8$ZVlTaDFINDQ5d21SbnIrNw$1P5N4HQ5OsaxZouNp+4hYW9aewww5v/XwIE7XZh7LtY"
    # this doesn't matter since we aren't setting up password recovery
    email: myemail@gmail.com
    groups: []
The passwords are encrypted using the settings specified in
configuration.yml. Passwords can be hashed with one-time runs of the
container:
docker run --rm authelia/authelia:latest authelia hash-password mysecretpassword
The authelia container can now be started.
Enabling Authelia in nginx
To enable Authelia in the nginx container from LinuxServer, edit the
nginx/site-confs/default file and add the following line to the main server
block:
include /config/nginx/authelia-server.conf;
Now, for each service you’d like to have Authelia enabled on, uncomment the
following line in nginx/proxy-confs:
include /config/nginx/authelia-location.conf;
Restart the linuxserver/swag container, and browse to a page where Authelia is enabled. You should be redirected to the authentication portal:

Our security has been… hardened
After passing the first factor (using the password you set in
users-database.yml), if all things went well, you should get a push
notification on your mobile device.
After approving the sign-in attempt, you should have access to the underlying application(s). Remember that this session is persistent across all of your proxied services, so you don’t have to do it often.
Conclusion
That’s it! The whole process is really simple if you’re using the LinuxServer
nginx container. If not, Authelia provides some docker-compose
bundles which you can
use to get things up and running. Happy authenticating!